I Made a Column So Narrow in Google Sheets I Dont Know How to Make It White Again
Welcome to the layout basics tutorial in Jetpack Compose. Jetpack Compose uses Kotlin code to brand layouts. In this article, we volition learn virtually rows and columns in Jetpack Compose and make a small-scale demo app that looks similar this:

Note that compose version is i.0.ane
1. Rows
Rows are the first principal layout you volition use when building apps with Jetpack Compose. Rows are oriented from left to correct. In our app we will at present create a Composable function that will return a row that we will add to our cavalcade.
A row can be built the post-obit way:

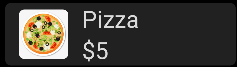
Row( modifier = Modifier.fillMaxWidth().padding(viii.dp), verticalAlignment = Alignment.CenterVertically ) { Text( text = "Pizza", style = MaterialTheme.typography.h4, modifier = Modifier.padding(beginning = twenty.dp) ) Text( text = "$5", fashion = MaterialTheme.typography.h6, modifier = Modifier.padding(start = twenty.dp) ) } Chaining Elements in Rows
As you tin can come across, a Row tin have several parameters. We assign it a Modifier and with our Modifier nosotros are able to concatenation elements. For instance, nosotros can specify our width, padding, and background as we see in our preview.
Aligning Row Elements
In rows elements flow from left to right. To align elements vertically, nosotros simply add the verticalAlignment parameter and set it equal to 1 of the constants from Alignment.
2. Columns
Columns are the 2d master layout you volition encounter with Jetpack Compose. Columns are oriented vertically. A cavalcade can exist built like this:

Cavalcade( modifier = Modifier .fillMaxSize() .background(MaterialTheme.colors.surface), horizontalAlignment = Alignment.CenterHorizontally ) { Text( text = "Cavalcade Layout", fashion = MaterialTheme.typography.h4, color = MaterialTheme.colors.primary ) Text( text = "Pizza", style = MaterialTheme.typography.h6, color = MaterialTheme.colors.primary ) Text( text = "$5", style = MaterialTheme.typography.h6, color = MaterialTheme.colors.main ) } Chaining Elements in Columns
Just like Rows, we can chain elements in columns. Over again, we tin utilise a Modifier and add multiple properties that we tin can adapt like width, height, and padding.
Aligning elements in Columns
To position elements horizontally in a Column, nosotros tin can apply horizontalAlignment property and assign information technology a constant value from Alignment to change how items will be positioned.
3. Boxes
Boxes are the tertiary main layout in Jetpack Compose. The primary use for boxes is to stack kid elements on top of each other.
Chaining Backdrop in Boxes
Like Rows and Columns, we can concatenation multiple properties with our Modifier to alter the size and appearance of Boxes.
Aligning Child Elements in Boxes
With Boxes, we can specify where we would like to align our kid elements on our box. Our three vertical options are top, center, and lesser. Our horizontal options are start, center, and end. The following code shows the nine possible alignments in activity.

Box( modifier = Modifier .fillMaxWidth() .pinnacle(140.dp) ) { Text(text = "Height Outset", modifier = Modifier.align(Alignment.TopStart)) Text(text = "Tiptop Heart", modifier = Modifier.align(Alignment.TopCenter)) Text(text = "Height Cease", modifier = Modifier.marshal(Alignment.TopEnd)) Text(text = "Center Start", modifier = Modifier.marshal(Alignment.CenterStart)) Text(text = "Center", modifier = Modifier.align(Alignment.Heart)) Text(text = "Center Stop", modifier = Modifier.align(Alignment.CenterEnd)) Text(text = "Lesser Start", modifier = Modifier.align(Alignment.BottomStart)) Text(text = "Bottom Center", modifier = Modifier.align(Alignment.BottomCenter)) Text(text = "Bottom End", modifier = Modifier.align(Alignment.BottomEnd)) } 4. Nested Layouts
When one layout is positioned within another layout, this creates a nested layout. For instance, the post-obit function for our demo application will nest a column inside a row.
@Composable fun CustomRow ( name:Cord, cost:String, painter: Painter, icon: Painter ) { Row( modifier = Modifier .padding(12.dp) .clip(RoundedCornerShape(eight.dp)) .background(MaterialTheme.colors.surface) .fillMaxWidth(), verticalAlignment = Alignment.CenterVertically ) { Box( modifier = Modifier .padding(start = 20.dp) .clip(RoundedCornerShape(8.dp)) .size(72.dp) ) { Paradigm( modifier = Modifier.fillMaxSize(1f), painter = painter, contentDescription = "Food", ) Epitome( modifier = Modifier.size(twenty.dp).marshal(Alignment.BottomEnd), painter = icon, contentDescription = "icon" ) } Cavalcade { Text( text = name, way = MaterialTheme.typography.h4, modifier = Modifier.padding(start = xx.dp) ) Text( text = cost, mode = MaterialTheme.typography.h4, modifier = Modifier.padding(start = xx.dp) ) } } } Our CustomRow function takes four parameters. The showtime represents the name of the food we will add together to the list. The second is the toll, and the third is a Painter object which we will utilise to create an prototype to go along with the food that we added to our list. Finally, we add a Painter to act as an icon. The first object created with this function is a row Also, we volition align the contents of our row to the heart on our vertical axis and change the background of our row to our surface colour from MaterialTheme. Next, we will add together a Box with 2 Images and stack them. Then, nosotros will add a column with two Text fields.
Our demo application uses a cavalcade as its main layout and repeatedly uses the CustomRow function to nest rows within our column.
@Composable fun AndroidCafe () { Surface( color = MaterialTheme.colors.background ) { Scaffold( topBar = { Text( text = "Android Cafe", modifier = Modifier.padding(12.dp), style = MaterialTheme.typography.h4 ) } ) { Column( modifier = Modifier.fillMaxSize() ) { CustomRow( name = "Pizza","$5", painter = painterResource(id = R.drawable.pizza) ) CustomRow( proper noun = "Java","$1", painter = painterResource(id = R.drawable.coffee) ) CustomRow( name = "Salad","$2", painter = painterResource(id = R.drawable.salad) ) CustomRow( proper noun = "Ice Cream","$.63", painter = painterResource(id = R.drawable.ice_cream) ) } } } } 5. Conclusion
That'due south all for this app!. Even with just Rows, Columns, and Boxes y'all can create intuitive user interfaces in Jetpack Compose. if yous would like to access the total repository for this app, click the Button below for the GitHub repository for this project.
6. External links and source lawmaking
Documentation for Jetpack Compose layouts
Here is the total Github repository for this commodity:
Become Author
We are making content on new declarative UI kit Jetpack Etch, if y'all are willing to build content join us and we will help you get started.
Here We Become Again : (
if (article == helpful) { println("Similar and subscribe to blog newsletter.") } else { println("Let me know what i should blog on.") } You lot must log in to post a comment.
jeffersonwelaidene.blogspot.com
Source: https://developersbreach.com/basic-rows-columns-compose/
Belum ada Komentar untuk "I Made a Column So Narrow in Google Sheets I Dont Know How to Make It White Again"
Posting Komentar